Unlocking the Magic of Old Fashioned Pink Popcorn: Your Guide to a Flawless Candy Coating
There's a certain enchantment to old fashioned pink popcorn. It’s more than just a snack; it's a vibrant, crunchy hug of nostalgia, instantly transporting you back to childhood carnivals, bustling fairs, and cherished family movie nights. The secret to this timeless treat lies not just in its appealing hue, but in the irresistible, sweet, and perfectly crisp candy coating that envelops each fluffy kernel. Mastering this coating is key to recreating that authentic, delightful experience right in your own kitchen.
Forget sticky, unevenly coated kernels or a brittle, overcooked crunch. This comprehensive guide will walk you through every step, from popping the perfect popcorn to achieving that gorgeous, glossy, and supremely satisfying candy shell, ensuring your homemade old fashioned pink popcorn is nothing short of perfection.
The Allure of Old Fashioned Pink Popcorn: A Timeless Treat
Why does old fashioned pink popcorn hold such a special place in our hearts? Its appeal is multifaceted:
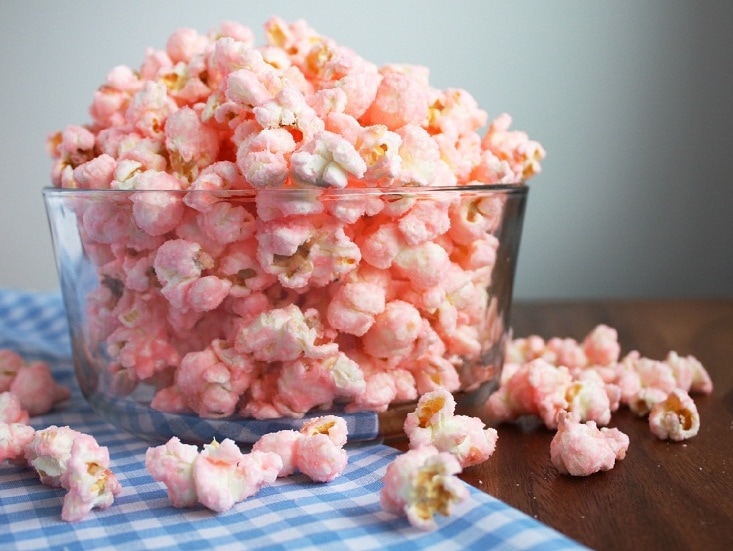
- Nostalgic Charm: The very sight and taste evoke memories of simpler times. It's a comforting flavor, reminiscent of classic caramel corn but with its own unique, creamy sweetness.
- Vibrant Presentation: That signature pink color makes it a showstopper at any gathering. It's perfect for birthday parties, baby showers, holiday celebrations, or simply to add a splash of joyful color to your snack routine.
- Irresistible Texture: Each piece offers a delightful contrast – the light, airy crunch of popcorn encased in a sweet, hard candy shell that yields with a satisfying snap.
- Effortlessly Fun: While the coating requires a little attention, the overall process is incredibly rewarding and surprisingly easy, making it a fantastic project for home cooks of all skill levels.
Embrace the joy of crafting this beloved snack, and get ready to impress your taste buds and your guests!
The Foundation: Perfect Popcorn Preparation
Before you even think about the candy coating, you need a stellar base: perfectly popped popcorn. The type and preparation of your popcorn are crucial for the coating to adhere properly and create that ideal texture.
Choosing Your Popcorn
You have two main options for popping your kernels:
- Stovetop Kernels: This method offers the freshest popcorn and gives you the most control. You'll need ½ cup of unpopped popcorn kernels.
- Microwave Popcorn: For a quicker prep, 3 bags of plain, unbuttered microwave popcorn are an excellent alternative. The key here is unbuttered – any oil or butter on the popcorn will prevent the candy coating from sticking effectively.
Popping Perfection Tips
- For Stovetop: Heat a large, heavy-bottomed pot over medium-high heat with a tablespoon or two of a neutral oil (like vegetable or canola) for about 2 minutes. Add your kernels, cover, and shake occasionally. Once popping begins, reduce the heat slightly and shake more frequently. Remove from heat when the popping slows to roughly 3 seconds between pops. Immediately transfer the popped popcorn to a very large bowl, discarding any un-popped kernels or 'old maids'. This ensures a consistent texture and avoids hard, unexpected bites.
- For Microwave: Simply pop your plain, unbuttered bags according to package directions. Again, transfer to a large bowl and discard any un-popped kernels.
Pro Tip: Ensure your popcorn is completely cool and dry before applying the coating. Any residual moisture can affect the candy's texture and crispness.
The Secret to Success: Mastering the Pink Candy Coating
This is where the magic truly happens. The candy coating transforms ordinary popcorn into the extraordinary old fashioned pink popcorn you remember. Precision and timing are your best friends here.
Essential Ingredients for Your Candy Coating
The components of this coating are simple, but each plays a vital role:
- Granulated Sugar (2 cups): The primary base for sweetness and structure.
- Heavy Whipping Cream (⅔ cup): Adds richness, creaminess, and helps achieve that delightful chewiness in the candy shell. It also contributes to a smoother, less brittle texture compared to water-based coatings.
- Corn Syrup (2 tablespoons): A crucial ingredient! Corn syrup acts as an invert sugar, preventing sugar crystallization. Without it, your candy coating could turn grainy or seize up.
- Salt (¼ teaspoon): A small but mighty addition that balances the sweetness and enhances all the flavors.
- Vanilla Extract (1 teaspoon): Adds a warm, aromatic depth to the flavor.
- Red Food Coloring (2-3 drops): Creates that iconic, vibrant pink hue. Adjust to your desired shade.
Step-by-Step Coating Perfection
- Combine & Boil: In a large, heavy-bottomed saucepan (this is important for even heat distribution), combine the sugar, heavy cream, corn syrup, and salt. Place over medium-high heat and stir constantly until the sugar dissolves. Bring the mixture to a full rolling boil that cannot be stirred away. This indicates it's truly at a high temperature.
- Cook to Temperature: Continue to boil the mixture for exactly 4 minutes. For optimal results and consistency, we highly recommend using a candy thermometer. The ideal temperature is 235°F (113°C), which is the soft-ball stage. Achieving this precise temperature ensures the candy coating will set properly – firm but not too hard, and perfectly crunchy.
- Flavor & Color: Immediately remove the saucepan from the heat. Carefully stir in the vanilla extract and red food coloring until they are thoroughly combined and the mixture boasts a uniform, beautiful pink color. Adding these after boiling preserves their integrity and prevents the heat from degrading their flavor or hue.
- Coat the Popcorn: Without delay, pour the hot pink candy coating evenly over your prepared popcorn in the large bowl. Working quickly and gently, use a large spoon or spatula to stir and toss the popcorn, ensuring every kernel is coated. Be careful not to crush the popcorn.
- Cool & Set: Spread the coated popcorn in a single layer on sheets of wax paper or parchment paper placed on a baking sheet. Allow it to cool completely and set, which usually takes about 15-30 minutes. Once firm, break apart any large clumps to create individual, perfectly coated pieces.
For an alternative perspective on crafting this sweet treat, you might find our Relive Carnival Fun: Easy Old Fashioned Pink Popcorn Recipe a valuable resource.
Troubleshooting Your Candy Coating: Common Pitfalls and Solutions
Even with careful attention, candy making can sometimes present challenges. Here’s how to address common issues:
- Sticky Popcorn: If your old fashioned pink popcorn turns out sticky, the candy coating likely didn't reach the correct temperature (235°F/soft-ball stage) or wasn't boiled long enough. It means there's still too much moisture in the syrup.
- Solution: Ensure you use a candy thermometer for accuracy. If you don't have one, try boiling for an extra 30-60 seconds next time, keeping a close eye on it.
- Hard or Brittle Popcorn: Conversely, if your coating is too hard or brittle, it means the syrup was cooked past the soft-ball stage, likely reaching the firm-ball or hard-ball stage.
- Solution: Pay close attention to your thermometer and remove it from heat immediately once 235°F is reached. If not using a thermometer, reduce the boiling time slightly.
- Uneven Coating: This can happen if the syrup isn't distributed quickly enough or if the popcorn isn't thoroughly mixed.
- Solution: Work quickly! Pour the syrup evenly in a circular motion over the popcorn, then gently and continuously fold the popcorn with a spatula until every kernel looks coated. Using an extra-large bowl helps with this.
- Grainy Coating: If your candy feels grainy, it's often due to sugar crystallization. This can be caused by not enough corn syrup, stirring the mixture vigorously while it's boiling (which encourages sugar crystals to form), or sugar crystals adhering to the sides of the saucepan and falling back in.
- Solution: Ensure you use the corn syrup. Avoid stirring once the mixture starts boiling, and use a wet pastry brush to wash down any sugar crystals from the sides of the pan during the early boiling stages.
Beyond the Basics: Customization and Serving Ideas
While the classic old fashioned pink popcorn is wonderful on its own, don't hesitate to experiment!
- Flavor Variations:
- Strawberry Delight: As suggested, add a few drops of strawberry extract along with the vanilla for a fruity twist.
- Almond Bliss: Replace vanilla with almond extract for a marzipan-like aroma.
- Citrus Zest: A tiny bit of orange or lemon zest stirred in with the vanilla can add a bright counterpoint (ensure it's very fine zest).
- Color Customization: While pink is traditional, you can easily change the food coloring to match any theme – blue for a baby shower, green for St. Patrick's Day, or orange for Halloween.
- Reduced Sweetness: If you prefer a less sweet snack, you can slightly reduce the sugar. However, be aware that this will affect the candy coating's texture and may result in a softer or less crisp shell. It's a delicate balance!
Serving and Storage
Serve your old fashioned pink popcorn immediately for the best taste and texture. It pairs wonderfully with a cold beverage, other party snacks, or simply enjoyed on its own. To store leftovers, place them in an airtight container at room temperature for up to 3 days. Avoid refrigerating, as the moisture can make the candy coating sticky and lose its crunch. If it does lose some crispness, you can gently reheat it in a low oven (around 200°F/95°C) for a few minutes to restore some of its crunch.
Conclusion
Mastering old fashioned pink popcorn, particularly its irresistible candy coating, is a delightful journey into the heart of nostalgic treats. By understanding the roles of key ingredients, adhering to precise temperatures, and learning to troubleshoot common issues, you can confidently create a batch that's perfectly crunchy, beautifully pink, and bursting with creamy sweetness every time. So, gather your ingredients, fire up your stove, and prepare to bring a little bit of carnival magic and a whole lot of deliciousness into your home. Happy popping!
