Homemade Pink Popcorn: Sweet, Crunchy & Vibrant Party Snack Guide
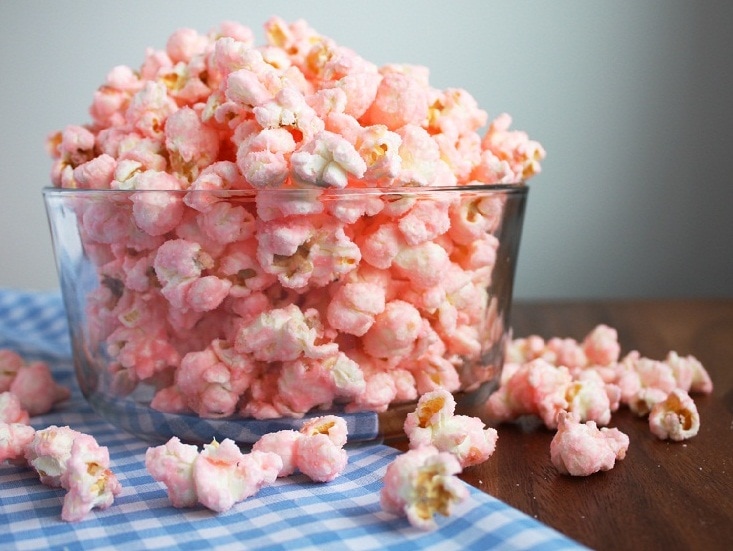
Step right up and prepare to whisk your taste buds back in time with a delightful batch of homemade pink popcorn! This charming confection, often dubbed
old fashioned pink popcorn, is more than just a snack; it's a vibrant, sweet, and crunchy trip down memory lane. Evoking images of bustling carnivals, lively fairs, and carefree childhood celebrations, this irresistible treat is surprisingly simple to recreate in your own kitchen. Get ready to fill your home with a comforting aroma and your palate with pure, nostalgic bliss.
Why Homemade Pink Popcorn? A Taste of Nostalgia & Joy
There's something truly special about
old fashioned pink popcorn that transcends a typical snack. It’s an experience, a memory, and a burst of color all rolled into one. Here’s why you’ll absolutely adore making this vibrant treat at home:
- Nostalgic Charm: Few snacks capture the essence of childhood fun quite like pink popcorn. It instantly transports you back to simpler times, making it a perfect conversation starter and a beloved family tradition.
- Irresistible Sweet Crunch: Each perfectly popped kernel is enveloped in a rich, creamy candy glaze that delivers a satisfying crunch followed by a burst of sweetness. It’s a texture and flavor combination that’s truly addictive.
- Vibrant & Visually Appealing: The striking pink hue makes this popcorn a showstopper at any gathering. It’s perfect for birthday parties, baby showers, holiday celebrations, or simply to add a touch of whimsy to your everyday snacking.
- Effortlessly Customizable: While the classic recipe shines, you can easily tweak the color for different themes or experiment with various extracts to introduce new flavor dimensions.
- Simple to Master: Despite its impressive appearance, creating homemade old fashioned pink popcorn is a straightforward process, making it accessible for home cooks of all skill levels.
The Secret to Perfect Pink Popcorn: Mastering the Candy Coating
The magic of
old fashioned pink popcorn lies entirely within its shimmering, sweet candy coating. This isn't just sugar syrup; it's a carefully crafted caramel-like glaze that delivers both flavor and that iconic crunch. Understanding the components and process of this coating is key to your success.
The foundation of our pink candy coating involves granulated sugar, heavy whipping cream, corn syrup, and a pinch of salt. Each ingredient plays a crucial role:
- Granulated Sugar: The primary sweetening agent, forming the crystalline structure of the candy.
- Heavy Whipping Cream: Adds richness, creaminess, and helps prevent the sugar from crystallizing too quickly, resulting in a smoother coating.
- Corn Syrup: A crucial ingredient for candy making, corn syrup prevents sugar crystallization, creating a smoother, glossier, and more pliable coating that won't become grainy. It contributes to the desired chewy-crunchy texture.
- Salt: A small amount of salt perfectly balances the sweetness, enhancing the overall flavor profile.
When these ingredients are brought to a boil, they undergo a transformation. The sugar melts and caramelizes slightly, creating a delicious base. The precision of this step is vital. Boiling the mixture to the correct temperature (or for the right amount of time if you're without a candy thermometer) ensures the coating will set properly – not too soft and sticky, nor too hard and brittle. For a deeper dive into perfecting this crucial step, you might find these insights on
Master Old Fashioned Pink Popcorn: Tips for Perfect Candy Coating incredibly helpful.
Once off the heat, vanilla extract and vibrant red food coloring are stirred in. The vanilla infuses a warm, comforting aroma and flavor, while the food coloring creates that signature, eye-catching pink hue that makes this popcorn so recognizable and delightful.
Homemade Pink Popcorn Recipe: Step-by-Step Guide
Ready to create your own batch of this classic treat? Here's how to make delicious
old fashioned pink popcorn right in your kitchen.
What You'll Need: Ingredients
- ½ cup unpopped popcorn kernels (or 3 bags of plain, unbuttered microwave popcorn)
- 2 cups granulated sugar
- ⅔ cup heavy whipping cream
- 2 tablespoons corn syrup
- ¼ teaspoon salt
- 1 teaspoon vanilla extract
- 2-3 drops red food coloring (gel food coloring provides a more vibrant and consistent color)
- *Optional:* A few drops of strawberry extract for a fruity twist
Equipment Essentials
- Large, heavy-bottomed pot with a lid (for stovetop popping)
- Extra-large bowl (for mixing popcorn and coating)
- Large saucepan (for candy coating)
- Candy thermometer (highly recommended for best results, though optional)
- Wooden spoon or heat-proof spatula
- Wax paper or parchment paper
Instructions for Sweet, Crunchy Pink Popcorn
- Pop Your Popcorn:
- Stovetop Method: Pour a thin layer of neutral oil (like canola or coconut) into your large pot, enough to coat the bottom. Heat over medium-high heat for about 2 minutes. Add 2-3 kernels and cover. Once those pop, add the remaining ½ cup of kernels, cover, and shake the pot gently but continuously to ensure even heating and prevent burning. Reduce heat slightly when popping becomes vigorous. Remove from heat when popping slows to about 3 seconds between pops.
- Microwave Method: If using microwave popcorn, prepare 3 bags of plain, unbuttered popcorn according to package directions.
Once popped, immediately transfer all the popped popcorn to your extra-large bowl. Carefully pick out and discard any un-popped kernels (also known as "old maids") to prevent hard bites.
- Prepare the Candy Coating (Work Quickly!): In your large saucepan, combine the granulated sugar, heavy cream, corn syrup, and salt. Place over medium-high heat. Bring the mixture to a full, rolling boil that cannot be stirred away.
- Boil to Perfection: Continue to boil the mixture for exactly 4 minutes. For best accuracy, if you're using a candy thermometer, boil until the mixture reaches 235°F (113°C), which is the soft-ball stage. Maintaining the correct temperature is crucial for the coating to set perfectly.
- Add Flavor and Color: Immediately remove the saucepan from the heat. Stir in the vanilla extract and your red food coloring until thoroughly combined and the mixture is a uniform vibrant pink. If adding strawberry extract, do so now.
- Coat the Popcorn: Pour the hot pink candy coating evenly over the popcorn in the extra-large bowl. Using your wooden spoon or spatula, gently but quickly stir to coat all the popcorn kernels as evenly as possible. Work fast, as the coating will begin to set as it cools.
- Cool and Break Apart: Spread the coated popcorn in a single layer onto sheets of wax paper or parchment paper laid out on a counter or baking sheet. Allow it to cool completely and set. Once cool and firm, break apart any large clumps into individual pieces.
For more recipe specifics and to relive the full carnival experience, check out our guide on
Relive Carnival Fun: Easy Old Fashioned Pink Popcorn Recipe.
Expert Tips for Your Best Pink Popcorn Yet
Achieving that perfect balance of sweet, crunchy, and beautiful
old fashioned pink popcorn is easy with a few insider tips:
- Choose the Right Popcorn: Whether you opt for stovetop kernels, an air popper, or microwave bags, ensure your popcorn is *plain and unbuttered*. Any butter or oil on the popcorn itself will prevent the candy coating from sticking properly.
- Embrace the Candy Thermometer: While boiling for 4 minutes is a reliable guideline, a candy thermometer offers unparalleled accuracy. Hitting 235°F ensures the soft-ball stage, which is perfect for a coating that’s firm but not rock-hard.
- Speed is Your Ally: The candy coating begins to set as soon as it's removed from the heat. Have all your ingredients measured, popcorn popped, and equipment ready *before* you start the coating process. Pour, stir, and spread quickly!
- Gel Food Coloring for Best Results: While liquid food coloring works, gel food coloring provides a much more concentrated and vibrant color without adding excess liquid to your candy coating, ensuring a richer pink hue.
- Flavor Variations: Don't stop at vanilla and strawberry! Experiment with other extracts like almond, raspberry, or even a touch of rosewater for unique flavor profiles that can still complement the nostalgic feel of old fashioned pink popcorn.
- Less Sweet Option: If you find the traditional recipe a bit too sweet, you can reduce the sugar slightly. However, be aware that this might affect the final texture of the candy coating, making it potentially less firm or crunchy. Experiment with small reductions first.
- The Big Bowl Advantage: Use the largest bowl you have for mixing the popcorn with the coating. This allows for easier, more even stirring without crushing too many kernels.
Serving and Storing Your Vibrant Snack
Once your homemade
old fashioned pink popcorn has cooled and set, it's ready to be devoured! This snack is fantastic served in individual bowls at parties, packaged in clear cellophane bags as charming party favors, or simply enjoyed straight from a large bowl during a movie night. Its vibrant color makes it a festive addition to any dessert table or holiday spread.
To maintain its delightful crunch and flavor, store any leftover pink popcorn in an airtight container at room temperature. It will keep well for up to 3 days. A crucial tip: *avoid refrigerating* this treat, as the moisture from the fridge can cause the candy coating to become sticky and lose its crispness. If, over time, your popcorn does lose a bit of its initial crunch, you can gently reheat it in a low oven (around 250°F or 120°C) for a few minutes to help restore its crisp texture. Enjoy this delightful recipe on its own or alongside your favorite festive beverages and other sweet treats.
So go ahead, embrace the joy of creating this beautiful and delicious
old fashioned pink popcorn. It’s a simple recipe that promises big smiles, satisfying crunch, and a delightful journey back to the sweet, carefree days of yesteryear.